The handbrake, commonly referred to as the parking brake or emergency brake, plays a vital role in vehicle safety. Its primary purpose is to ensure that a stationary vehicle remains securely in place, particularly on slopes. Unlike the primary hydraulic braking system that relies on fluid pressure, the parking brake employs a mechanical operation through a series of cables and levers that engage the rear wheels. Over time, wear and tear may lead to cable stretching or brake pad degradation, resulting in a loose or ineffective parking brake that needs adjustment. This handbrake adjustment guide will walk you through restoring proper tension and ensuring your parking brake operates effectively.
Recognizing a loose parking brake is essential for maintaining safety. One prevalent sign is excessive travel of the handbrake lever or pedal before it fully engages, meaning that it either pulls too high or pushes too far down without resistance. This could allow the vehicle to roll slightly, especially on inclines, creating a serious safety hazard. Other symptoms include a loose, “spongy” feel of the lever or the activation of the handbrake warning light when engaged, yet failing to hold the vehicle securely.
What are the Observable Symptoms of a Loose Parking Brake?
A loose parking brake presents several distinct symptoms that signal a need for adjustment. The most obvious indicator is the excessive travel of the handbrake lever or pedal before the brake fully engages. This could result in the lever rising too high or the pedal sinking too low without providing adequate resistance. Consequently, when parked on an incline, the vehicle may roll slightly, which is a considerable safety risk. Moreover, a loose or “spongy” feel to the lever is another warning sign, along with the illumination of the handbrake warning light, indicating an issue with the system.
How Does a Parking Brake System Function Mechanically?
The operation of the parking brake system is distinct from the vehicle’s primary hydraulic brakes. This system typically utilizes a steel braided cable that runs from the handbrake lever or foot pedal to the rear brake assemblies. Upon engaging the parking brake, this cable pulls a lever, which mechanically applies pressure to either the brake shoes in a drum brake or a designated mechanism in disc brakes, preventing the wheels from turning. In vehicles with rear drum brakes, the cable moves the brake shoes against the drum’s interior surface. Conversely, in vehicles equipped with rear disc brakes, the parking brake often activates a smaller internal drum-style brake, sometimes called a “drum-in-hat” design, or uses a corkscrew mechanism that applies pressure to the brake pads via the caliper piston.
What Tools and Materials Are Essential for Handbrake Adjustment?
Before embarking on a DIY handbrake adjustment, gather the necessary tools and materials to ensure a safe and accurate process. Essential supplies include:
- Vehicle Jack and Jack Stands: For safely lifting and supporting the vehicle’s rear wheels.
- Wheel Chocks: To prevent movement of the vehicle during the adjustment.
- Lug Wrench: For removing and re-installing wheel lug nuts.
- Basic Hand Tools: A set of wrenches or a ratchet with proper socket sizes (typically 10mm, 12mm, or 13mm) for adjuster nuts. Use flathead and Phillips screwdrivers as needed.
- Brake Spoon or Adjusting Tool: Designed to adjust star wheel adjusters in drum brakes or drum-in-hat systems. Specialized tools may be required for certain vehicles.
- Penetrating Oil: Used to loosen rusted or seized adjustment nuts.
- Brake Cleaner and Lubricant: For cleaning components and applying lubrication to threads and moving parts, ensuring smooth operation and preventing future seizing.
- Vehicle Service Manual: Highly recommended for specific adjustment procedures and torque specifications for your vehicle.
Step-by-Step Handbrake Adjustment Guide: Restoring Optimal Tension
A properly adjusted handbrake is crucial for securing your vehicle effectively. The adjustment process can vary slightly based on where the adjustment points are located.
How to Prepare Your Vehicle for Handbrake Adjustment?
Before performing any maintenance on your vehicle, prioritize safety. Start by parking the vehicle on a firm, level surface, and shift the transmission into “Park” (if automatic) or “Reverse/First” gear (if manual). Place wheel chocks on the front wheels to prevent movement. Before lifting the vehicle, slightly loosen the rear wheel lug nuts. Use a jack to raise the rear of the vehicle and support it securely with jack stands, ensuring both rear wheels are off the ground. Make sure to release the handbrake completely before proceeding.
Where are the Common Handbrake Adjustment Points Located?
Your vehicle’s parking brake adjustment points can typically be found in three main locations: at the handbrake lever inside the cabin, along the parking brake cable underneath the vehicle, or at the rear brake assemblies. Always consult your vehicle’s service manual to find the exact adjustment points for your model.
How to Adjust a Handbrake at the Lever (Console)?
Many vehicles have an adjustment nut located directly under the handbrake lever, often concealed beneath the console trim or handbrake boot.
- Carefully remove the console cover or boot to access the adjustment mechanism.
- Identify the adjustment nut, which is usually a single nut on a threaded rod or consists of two nuts (a jam nut and an adjusting nut).
- If applicable, first loosen the jam nut, then tighten the adjusting nut clockwise to increase cable tension, shortening the cable.
- Periodically pull the handbrake lever, noting the “clicks” until it feels firm. It should engage between 3 to 5 clicks for most vehicles, with some manufacturers specifying 5-7 clicks for drum brakes and 6-8 for disc brakes.
- Ensure that when the handbrake is fully released, the rear wheels spin freely without drag.
- Once satisfied with the adjustment, tighten the jam nut (if present) to secure the setting and replace the console trim.
How to Adjust a Handbrake Cable Under the Vehicle?
In certain vehicles, there’s often a single adjustment point located beneath the car where the primary cable split into two secondary cables, typically near an equalizer.
- Locate the adjustment point, usually a threaded rod connected to the parking brake cables. Apply penetrating oil if necessary.
- Loosen the locknut.
- Adjust the main nut to increase or decrease cable tension.
- Follow the “click” and free-spin test as described for console adjustments.
- Finally, tighten the locknut once the desired tension is achieved.
How to Adjust Parking Brakes with Rear Drum Brakes?
For vehicles equipped with drum brakes, a star wheel adjuster is often accessible through a rubber plug on the backing plate or by removing the drum itself. This adjustment ensures the brake shoes are adequately positioned for optimal function.
- Remove the rear wheels.
- Locate the rubber plug on the rear brake backing plate, often found at the 6 o’clock position. Remove it to gain access.
- Insert a brake spoon or flathead screwdriver into the hole to engage the star wheel adjuster.
- Rotate the star wheel (typically downwards to tighten) until the brake shoes lightly touch the inside of the drum, creating a slight drag when spinning the wheel hub by hand.
- Back off the adjuster 1-2 clicks (or follow specific turns recommended in your service manual) until the wheel spins freely with minimal to no drag.
- Repeat this process on the opposite side to ensure even adjustment.
- Re-install the rubber plugs and wheels.
How to Adjust Parking Brakes with Rear Disc Brakes?
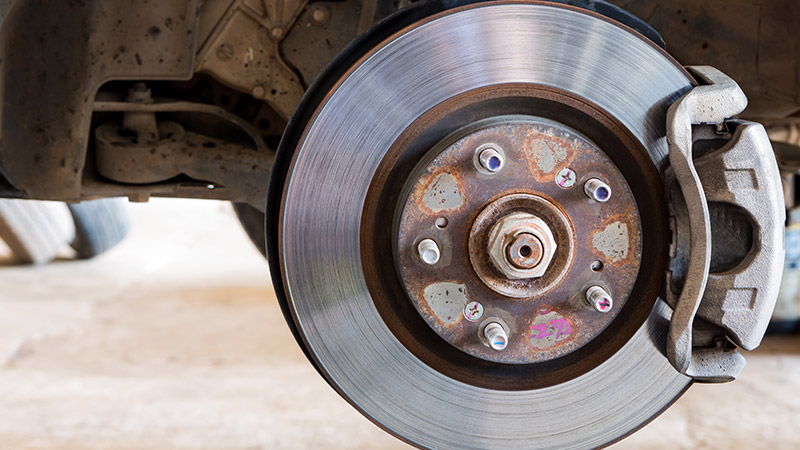
Vehicles equipped with rear disc brakes often feature a small drum-style parking brake integrated within the rotor’s hat.
- Remove the rear wheels.
- Identify the access hole on the brake rotor’s hat section, typically covered by a rubber grommet.
- Rotate the rotor until the access hole aligns with the internal star wheel adjuster.
- Insert a brake spoon or screwdriver, then rotate the star wheel to expand the parking brake shoes until a slight drag is felt when rotating the rotor by hand.
- Back off the adjuster a few clicks (e.g., 8 clicks as recommended for specific vehicles) until the rotor spins freely.
- Repeat this process on the opposite side to ensure equal engagement.
- Re-install the rubber plugs and wheels. For some rear disc brake calipers, parking brake adjustment may involve a mechanism directly on the caliper, necessitating attention to the specific vehicle design.
What are the Potential Risks of Improper Handbrake Adjustment?
Failing to adjust the handbrake properly can pose several risks. Over-tightening the parking brake cable or shoes may lead to premature wear of brake components, causing the brakes to drag when disengaged. This generates excessive heat, lowers fuel efficiency, and can lead to early wear of brake pads, shoes, and rotors. On the other hand, under-tightening results in an ineffective parking brake that fails to secure the vehicle properly, creating a significant risk of unintentional rolling. Additionally, incorrect adjustments can cause uneven braking, which may lead to one side dragging more than the other. If you’re uncertain about performing any adjustments, it’s advisable to consult a qualified mechanic.
Handbrake Adjustment vs. Cable Replacement: Understanding the Difference
Grasping the distinction between when to adjust versus replacing parking brake components is essential for effective vehicle maintenance.
Handbrake adjustment is a routine maintenance procedure designed to address normal cable stretching and minor wear on brake shoes or pads. It effectively restores proper tension to the system. Conversely, replacement is necessary when components are physically damaged, severely worn beyond any adjustment, or completely failed. For instance, frayed, corroded, snapped, or excessively stretched cables must be replaced since adjustment cannot restore their integrity. In the same vein, worn out parking brake shoes or pads, which no longer provide sufficient friction, will also require replacement rather than mere adjustment.
| Condition | Recommended Action | Justification |
|---|---|---|
| Loose lever, excessive clicks, vehicle rolls slightly | Adjustment | Indicates cable stretch or minor component wear within the adjustment range. |
| Handbrake cable visibly frayed, corroded, or broken | Replacement | Compromised structural integrity; adjustment is ineffective. |
| Brakes dragging after adjustment or lever feels stiff | Inspection/Adjustment (consider potential replacement of stuck components) | Could be due to over-tightening or seized components requiring repair/replacement. |
| Vehicle fails to hold even after full adjustment | Inspection/Replacement of brake shoes/pads or cable | Brake friction material may be excessively worn. |
Frequently Asked Questions about Parking Brake Maintenance
How often should a vehicle’s parking brake be adjusted?
Vehicle manufacturers typically recommend periodic inspections for parking brake cables to detect signs of wear. A good rule of thumb is to check and adjust the parking brake every one to two years or approximately every 75,000 miles, depending on usage. Additionally, it is prudent to assess the parking brake system whenever rear brake service is performed.
Can I manually adjust an electronic parking brake (EPB) system?
No, electronic parking brake (EPB) systems cannot be manually adjusted like their cable-actuated counterparts. Typically, EPBs are self-adjusting and rely on electric motors to engage the rear brakes. Should an EPB system malfunction or prompt a warning, it usually requires diagnosis and calibration using specialized tools, generally performed by an experienced technician. For further insights into these systems, check our article on The Future of Parking: Exploring the Electric Parking Brake System.
What are the definitive signs of a worn or failing handbrake cable that indicate replacement?
Certain indicators of a worn or failing handbrake cable signal the need for replacement. These include an excessively loose lever with low resistance, requiring many clicks to engage, or the vehicle still moving despite the handbrake being applied. Unusual noises like squeaking or grinding upon engaging the brake, a persistent handbrake warning light, or visible damage such as fraying or corrosion on the cable also warrant immediate attention. These symptoms indicate that the cable has stretched beyond its adjustment limits, has seized, or is damaged, hindering its effective operation.