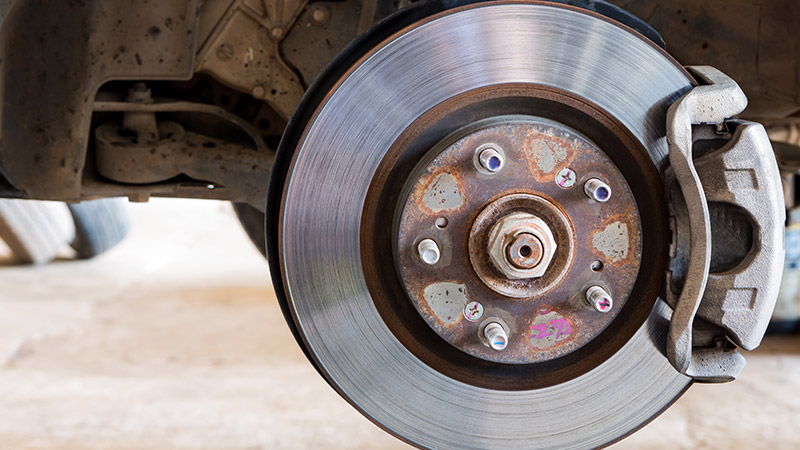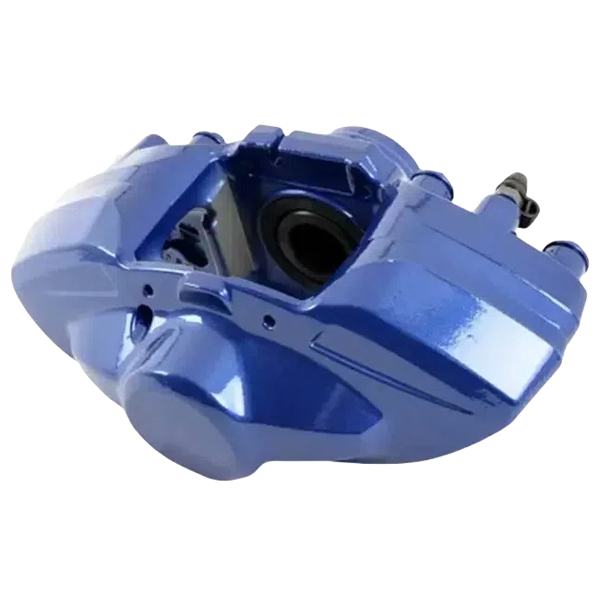
Your vehicle’s braking system is arguably its most critical safety component. While brake pads and rotors often get the spotlight, the brake calipers play an equally vital role in ensuring your car stops reliably and safely. Calipers are the components that house the brake pads and pistons, pressing the pads against the rotors to create the friction needed to slow and stop your wheels. Proper brake caliper maintenance is essential for optimal performance and safety. Ignoring these crucial components can lead to costly repairs and, more importantly, compromised stopping power.
This comprehensive guide will walk you through everything you need to know about brake caliper care, including common issues, effective troubleshooting steps, and practical DIY fixes. By understanding and addressing potential problems early, you can extend the life of your braking system and maintain peace of mind on the road.
The Importance of Regular Brake Caliper Maintenance
Consistent brake caliper maintenance is key to preventing major problems down the line. It ensures smooth operation, even pad wear, and consistent braking performance. Here’s what regular maintenance entails:
1. Routine Inspection
Make it a habit to inspect your brake calipers periodically, ideally every time you rotate your tires or change your oil. Look for:
- Leaks: Check for any signs of brake fluid leaking around the caliper or lines.
- Uneven Wear: Observe if your brake pads are wearing evenly across their surface. Uneven wear can indicate a caliper issue. For more on brake pads, check out our guide on Signs Your Ceramic Brake Pads Need Replacing.
- Corrosion: Rust and corrosion on the caliper body or piston can impede movement.
- Damage: Look for physical damage to the caliper body, mounting bolts, or rubber boots.
- Rotor Condition: While inspecting calipers, also check the condition of your rotors. Learn more about their role in Brakes and Rotors Explained: A Comprehensive Guide to Your Car’s Stopping System.
2. Cleaning and Lubrication
Over time, brake dust and road grime can accumulate, hindering caliper movement. Cleaning and proper lubrication are vital:
- Caliper Slides and Pins: These need to move freely. Clean off old grease and apply high-temperature brake lubricant to the slide pins and contact points.
- Piston Boots: Ensure the rubber boots protecting the pistons are intact and free of cracks. These prevent contaminants from entering and damaging the piston seal.
3. Brake Fluid Checks
The brake fluid is the hydraulic medium that activates your calipers. Regularly check its level and condition. Dark or contaminated fluid needs flushing. Dive deeper into brake fluid testing with Beyond the Dipstick: Advanced Brake Fluid Testing for Optimal Safety, and explore different types in The Underdog: Demystifying DOT 5.1 Brake Fluid and Its Advantages.
Brake Caliper Maintenance Schedule
Here’s a general guideline for brake caliper maintenance:
| Maintenance Item | Frequency | Notes |
|---|---|---|
| Visual Inspection | Every 6,000 – 10,000 miles or with every tire rotation | Check for leaks, wear, damage, and corrosion. |
| Clean & Lubricate Slide Pins | Every 15,000 – 20,000 miles or with every brake pad replacement | Use high-temp brake grease. |
| Brake Fluid Check | Every 12 months or 12,000 miles | Check level and color. Flush as needed. |
| Brake Fluid Flush | Every 2-3 years or 30,000 – 45,000 miles | Follow manufacturer recommendations. |
Common Brake Caliper Issues and Troubleshooting
Even with diligent maintenance, brake calipers can develop issues. Recognizing the symptoms early is crucial for effective brake caliper troubleshooting.
Common Symptoms of Brake Caliper Problems:
- Pulling to One Side: The vehicle veers to the left or right when braking.
- Uneven Brake Pad Wear: One side of the brake pad is significantly more worn than the other, or one wheel’s pads are more worn than the others.
- Squealing or Grinding Noises: While often associated with worn pads, it can also indicate a caliper problem.
- Reduced Braking Performance: A spongy pedal, increased stopping distance, or a feeling that the brakes aren’t working as effectively.
- Burning Smell: Often signifies overheating brakes due to a dragging caliper.
- Fluid Leaks: Puddles of fluid near the wheels or visible fluid on the caliper.
- Wheel Feeling Hot: One wheel feeling significantly hotter than the others after driving, indicating a dragging brake.
- Steering Wheel Vibration: Can sometimes be caused by a seized caliper causing rotor runout, though often points to warped rotors.
Troubleshooting Table for Caliper Issues
Use this table to help diagnose potential brake caliper problems:
| Symptom | Possible Caliper Issue | Diagnostic Steps |
|---|---|---|
| Vehicle Pulls to One Side During Braking | Sticking/Seized Caliper (Piston or Slide Pins) | Inspect both front calipers. Check for free movement of slide pins and proper piston retraction. Compare brake pad wear. |
| Uneven Brake Pad Wear | Sticking Piston, Seized Slide Pins, Contaminated Pads | Remove caliper and pads. Check piston for smooth retraction. Inspect slide pins for corrosion/sticking. |
| Grinding/Squealing Noise (after pad replacement) | Insufficient Lubrication on Slide Pins, Stuck Pad, Damaged Anti-Rattle Clips | Re-inspect pad installation, lubrication points, and hardware. |
| Soft/Spongy Brake Pedal | Air in System, Caliper Leak, Bad Master Cylinder | Check for fluid leaks around calipers. Bleed brakes. If problem persists, suspect master cylinder. |
| Burning Smell/Hot Wheel | Dragging Caliper (Piston not retracting, seized slide pins) | Lift wheel and try to spin by hand (when safe). If stiff, caliper is dragging. |
| Visible Fluid Leak around Wheel | Damaged Piston Seal, Cracked Caliper Body, Loose Bleeder Valve/Brake Line | Pinpoint leak source. Inspect piston boot, caliper body, and connections. |
DIY Fixes for Common Brake Caliper Problems
While some caliper issues require professional attention (especially internal piston problems or structural damage), many common issues can be resolved with DIY fixes. Always prioritize safety and consult a professional if you’re unsure.
Tools you’ll likely need: Jack and jack stands, lug wrench, brake cleaner, wire brush, high-temp brake lubricant, C-clamp or piston compression tool, proper wrench/socket set, bleeder wrench, new brake fluid, shop rags, safety glasses, gloves.
1. Addressing Sticking or Seized Slide Pins
This is one of the most common causes of uneven pad wear and pulling.
- Lift and Secure: Safely lift your vehicle and support it with jack stands. Remove the wheel.
- Remove Caliper: Unbolt the caliper from the caliper bracket. You may need to remove the caliper mounting bolts. Hang the caliper safely (do not let it hang by the brake line).
- Remove Pads & Bracket: Remove the old brake pads. Then, unbolt the caliper bracket from the knuckle.
- Clean Pins: Extract the slide pins from the caliper bracket. Use a wire brush and brake cleaner to thoroughly clean the pins and the bores they slide into. Ensure they move freely.
- Lubricate: Apply a generous amount of high-temperature brake lubricant to the slide pins.
- Reassemble: Reinstall the slide pins, caliper bracket, and brake pads. Ensure all bolts are torqued to manufacturer specifications.
2. Cleaning and Lubricating Piston and Caliper Body
If the piston seems sticky or hard to push back, or if there’s excessive rust preventing smooth movement:
- Access Caliper: Follow steps 1 and 2 above.
- Inspect Piston Boot: Carefully inspect the rubber boot around the piston for tears or cracks. If damaged, the caliper needs to be rebuilt or replaced.
- Clean Piston: Use a non-petroleum-based brake cleaner and a soft brush (like an old toothbrush) to clean any accumulated grime around the visible part of the piston.
- Lubricate: Apply a thin layer of high-temperature brake lubricant around the piston where it meets the boot.
- Compress Piston: Use a C-clamp or a specialized piston compression tool to slowly and steadily push the piston back into the caliper. It should move smoothly. If it’s very stiff or binds, the piston is likely seized, requiring a rebuild or replacement.
- Reassemble: Reinstall brake pads and caliper.
3. Bleeding Air from the Brake System
If you have a spongy pedal after working on your brakes, you likely have air in the system.
- Prepare: You’ll need a helper for this. Connect a clear hose to the bleeder valve on the caliper, with the other end submerged in a container with fresh brake fluid.
- Open Valve: Have your helper slowly press the brake pedal down and hold it. While they hold it, open the bleeder valve. You will see air bubbles (if present) and fluid come out.
- Close Valve: Before the pedal reaches the floor, close the bleeder valve.
- Release Pedal: Only after the valve is closed, tell your helper to release the pedal.
- Repeat: Repeat this process for each caliper (starting with the one furthest from the master cylinder) until no more air bubbles appear.
- Monitor Fluid: Continuously monitor and top up the master cylinder reservoir with fresh brake fluid to prevent air from re-entering the system.
For more detailed information on your entire braking system, explore our guide on Brakes and Rotors Explained: A Comprehensive Guide to Your Car’s Stopping System.
When to Seek Professional Help
While many issues can be DIY, some require professional expertise. These include:
- Damaged Caliper Body: Cracks or significant corrosion on the caliper itself.
- Severely Seized Piston: If the piston cannot be compressed smoothly, or if the boot is torn, a rebuild kit or new caliper is needed. This is often best left to a mechanic.
- Persistent Fluid Leaks: Especially if the source isn’t easily identifiable or involves brake lines.
- Unfamiliarity or Lack of Proper Tools: Brakes are too critical to compromise on safety.
Conclusion
Your brake calipers are indispensable for safe driving. By committing to regular brake caliper maintenance and understanding effective brake caliper troubleshooting, you can ensure your vehicle’s braking system remains reliable and responsive. Early detection and addressing minor issues can prevent more significant, and potentially dangerous, problems down the road. Stay vigilant with your inspections, don’t ignore unusual sounds or sensations, and always prioritize safety when working on your vehicle’s brakes.