Ensuring the proper brake fluid level is not just a routine task; it is an essential aspect of your vehicle’s safety and performance. The hydraulic braking system hinges on adequately filled and uncontaminated brake fluid, enabling your car to stop effectively when it matters most. A well-maintained brake fluid reservoir guarantees optimal responsiveness, helping you avoid potential brake failures and dangerous situations.
What is the Function of Brake Fluid in a Vehicle’s Braking System?
Brake fluid functions as a hydraulic medium, facilitating the transfer of mechanical force from the brake pedal to the calipers or shoes at each wheel. This incompressible fluid also plays a crucial role by lubricating the moving parts of the braking system and preventing corrosion in components like the master cylinder, wheel cylinders, and ABS units. Insufficient brake fluid can lead to a soft or spongy brake pedal, diminished braking performance, and increased stopping distances, all of which raise safety concerns.
How Do You Locate Your Car’s Brake Fluid Reservoir?
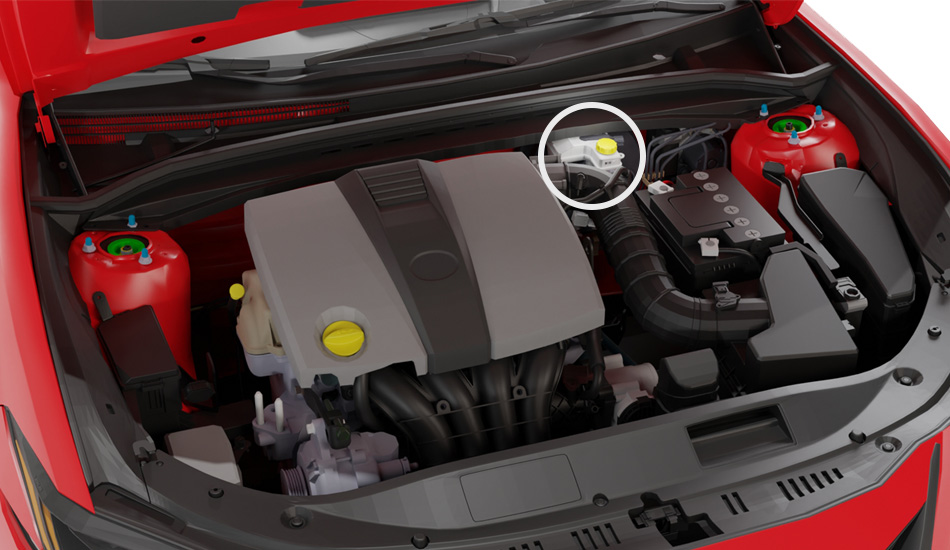
Finding your brake fluid reservoir is typically a straightforward task. It is usually a translucent plastic tank mounted on the master cylinder, often situated under the hood near the firewall, primarily on the driver’s side. Vehicle designs vary, so for some models—like the 2000-2004 Ford Focus—the reservoir is positioned on the right side of the engine bay near the windshield. However, for precise locations, refer to your vehicle’s owner’s manual.
What Are the Step-by-Step Instructions for Checking Brake Fluid Level?
Checking your vehicle’s brake fluid level is a simple process if you follow these steps:
- Park Safely and Allow Cooling: Park your vehicle on a level surface, engage the parking brake, and turn off the engine. Let it cool for at least 30 minutes to avoid burns and ensure an accurate fluid reading.
- Locate the Reservoir: Open the hood and find the brake fluid reservoir. Typically, this semi-transparent container has “MIN” and “MAX” lines marked on it. The cap is usually labeled “Brake Fluid” or features a warning symbol: an exclamation mark encircled.
- Inspect Fluid Level: Check the fluid level visually; it should be between the “MINIMUM” and “MAXIMUM” lines. If the fluid is near the “MIN” line, it is a signal for immediate action.
- Examine Fluid Color and Clarity: Fresh glycol-based brake fluid is typically translucent with a yellow or light golden hue. As it ages or absorbs moisture, it may turn dark amber or brown, indicating contamination that requires a professional brake fluid flush.
- Do Not Open Cap Unnecessarily: Brake fluid is hygroscopic, absorbing moisture from the air. Avoid opening the reservoir cap unless necessary, as this can introduce humidity into the system, compromising fluid performance.
A low brake fluid level may signify worn brake pads or leaks in the brake lines or calipers, rather than mere fluid consumption. If you notice a consistent drop in the level, a thorough inspection of the entire brake system is imperative.
When Should You Top Up Your Brake Fluid?
If the fluid level reaches or dips below the “MIN” line, it’s time to top up. However, it is vital to uncover the reason behind the low fluid. If it results from worn brake pads, merely adding fluid without addressing the pads could cause the level to rise significantly when new pads are installed, potentially leading to overflow. Rapid or recurring drops in fluid levels generally indicate leaks in the brake lines, calipers, or master cylinder seals, warranting professional assessment and repair.
What Are the Step-by-Step Instructions for Topping Up Brake Fluid?
Follow these steps to safely top up your brake fluid:
- Confirm Fluid Type: Refer to your vehicle’s owner’s manual or the brake fluid reservoir cap to identify the required DOT specification (e.g., DOT 3, DOT 4, DOT 5.1). Using the wrong fluid can contaminate the system and lead to brake failure.
- Clean Reservoir Area: Before removing the cap, clean the area surrounding the brake fluid reservoir thoroughly with a clean cloth. This helps prevent dirt or moisture from entering the hydraulic system, preserving brake integrity.
- Carefully Remove Cap: Gently unscrew or pry off the reservoir cap. Some caps may need a little coaxing at the corners. Avoid leaving the cap off for long, as brake fluid is hygroscopic and needs to be protected.
- Add Correct Fluid: With a clean funnel, pour the appropriate brake fluid into the reservoir until just below the “MAX” line. Do not overfill, as doing so can cause spills when the brake pads wear down or components expand due to heat. Since brake fluid is corrosive, promptly clean any spills with a cloth.
- Secure the Cap: Clean the cap’s interior with a lint-free cloth to remove any debris. Firmly secure the cap back in place until it clicks, ensuring a complete seal.
- Test Brake Pedal: After topping up, gently pump the brake pedal a few times to check for firmness. Drive the vehicle briefly, braking intermittently, then re-check the fluid level on a flat surface to confirm a successful fill.
Which Specific Types of Brake Fluid Are There, and How Do They Differ?
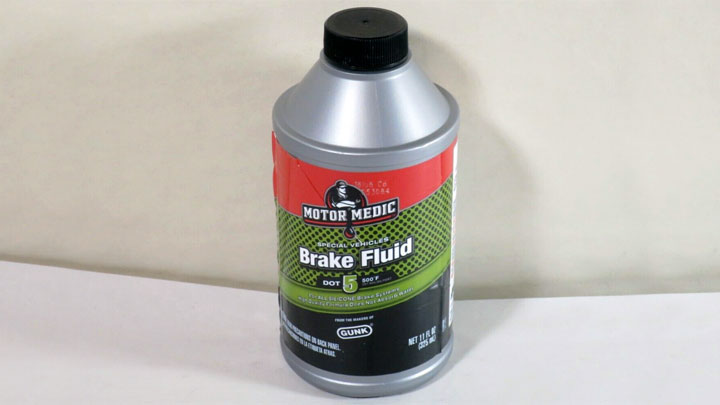
Brake fluids are classified by the U.S. Department of Transportation (DOT) based on boiling points and chemical composition. The most prevalent types are DOT 3, DOT 4, and DOT 5.1, all glycol-based and hygroscopic, meaning they absorb moisture over time. In contrast, DOT 5 is silicone-based and hydrophobic.
The “dry boiling point” refers to fresh fluid content, while the “wet boiling point” measures the fluid after absorbing 3.7% water, reflecting real-world conditions. As moisture levels rise, glycol-based fluid boiling points drop significantly, increasing the risk of vapor lock and brake fade, particularly under severe braking.
Brake Fluid Specifications Comparison
| Specification | Composition Type | Dry Boiling Point (Minimum) | Wet Boiling Point (Minimum) | Key Characteristics & Usage |
|---|---|---|---|---|
| DOT 3 | Glycol Ether Base (Polyethylene Glycol) | 205°C (401°F) | 140°C (284°F) | Cost-effective and widely available; absorbs up to 2% moisture per year. Common in older vehicles with simpler braking systems, but can damage paint. |
| DOT 4 | Glycol Ether & Borate Ester Base | 230°C (446°F) | 155°C (311°F) | Higher boiling point than DOT 3, ideal for modern cars, ABS, and demanding conditions like towing and European vehicles. Absorbs moisture faster than DOT 3. |
| DOT 5 | Silicone-based | 260°C (500°F) | 180°C (356°F) | Hydrophobic (does not absorb moisture), non-corrosive, and paint-safe. Not compatible with ABS systems or glycol-based fluids (DOT 3, 4, 5.1); typically used in classic cars. |
| DOT 5.1 | Glycol Ether & Borate Ester (high-performance blend) | 270°C (518°F) | 180°C (356°F) | Similar to DOT 4, but with higher boiling points and lower viscosity—ideal for high-performance vehicles with ABS and ESP. Compatible with DOT 3 and DOT 4. |
While DOT 3, DOT 4, and DOT 5.1 fluids can be mixed in emergencies, the resulting system will perform only to the standards of the lower-grade fluid present. However, DOT 5 (silicone-based) must NEVER be mixed with any other DOT fluid due to fundamental incompatibility that can lead to severe system damage and brake failure.
How Often Should Brake Fluid Be Replaced?
Typically, brake fluid should be replaced every 2 to 3 years or roughly every 30,000 to 36,000 miles, as it is hygroscopic and absorbs moisture over time. This absorbed moisture decreases the fluid’s boiling point, potentially resulting in brake fade and a soft pedal under aggressive driving. Several manufacturers, including Mercedes, recommend changing brake fluid every two years or 20,000 miles. For drivers in high-humidity environments or those who engage in heavy towing or drive in mountainous areas, more frequent changes—possibly annually or every 20,000 miles—may be necessary. Regular inspections of brake fluid, ideally every three to four months, are vital for maintaining safety.
For deeper insights into brake system components and functions, explore our extensive guide on How Do Brakes Work? A Simple Guide to Understanding Your Car’s Brake System. If your brake fluid warning light activates—characterized as an exclamation mark within a circle—this signals a critical issue demanding immediate attention. Learn more about its significance in Brake Fluid Warning Light: What It Means and What to Do. Regular maintenance, including brake pad and rotor inspections, helps extend your vehicle’s braking system life, as discussed in How do I properly maintain my car’s brake system to ensure optimal performance and lifespan?.
Frequently Asked Questions (FAQ)
Is it normal for brake fluid levels to drop?
While a minor drop in brake fluid level can occur due to normal brake pad wear—since caliper pistons extend further to compensate—a significant or rapid dip commonly signals worn brake pads exceeding service limits or a leak in the hydraulic system.
Can I mix different DOT types of brake fluid?
You can mix DOT 3, DOT 4, and DOT 5.1 fluids in emergencies due to their glycol-based properties; however, the system will only perform to the standards of the lowest DOT specification present. Absolutely avoid mixing DOT 5 (silicone-based) with any other DOT fluid, as this can cause grave incompatibility and system failure.
What color should new brake fluid be?
New glycol-based brake fluid (DOT 3, DOT 4, DOT 5.1) is generally clear with a translucent yellow or light golden tint, while DOT 5 (silicone-based) is typically purple. Dark brown or black fluid indicates contamination, necessitating a fluid flush.
What does a spongy brake pedal indicate?
A spongy or soft brake pedal can signal low brake fluid, air in the brake lines, or excessive moisture within the fluid that may cause boiling. This condition severely diminishes braking effectiveness, requiring immediate inspection.
Can low brake fluid cause the ABS light to come on?
Yes, low brake fluid can activate the ABS warning light along with the general brake fluid warning light, indicating a critical issue within the hydraulic braking system.