Ensuring your vehicle’s braking performance is optimal hinges on knowing how to check brake fluid level and color accurately. Regular monitoring can prevent brake system failures and costly repairs, empowering you to maintain your vehicle safely and effectively. The following guide provides a detailed approach to assessing brake fluid, including specifics on inspection techniques and the implications of fluid condition.
What Tools and Materials Do You Need to Check Brake Fluid?
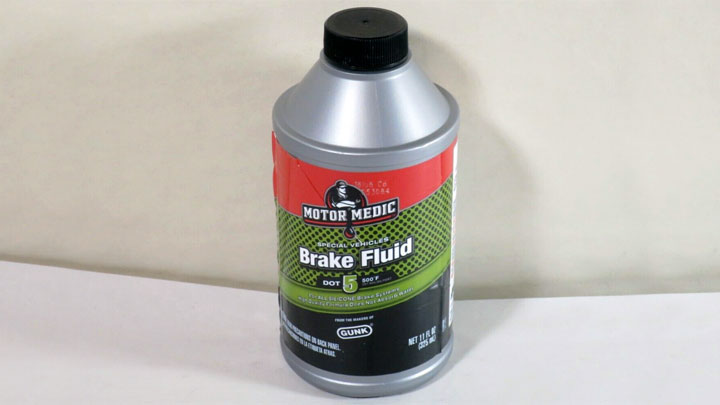
Before you commence the checking procedure, it’s vital to gather the appropriate tools and materials. The first essential item is brake fluid conforming to your vehicle manufacturer’s specifications, typically identified as DOT 3, DOT 4, or DOT 5. Beyond the fluid, a flashlight is advantageous for visibility, especially under the hood where light can be limited.
A clean cloth or towel is useful for tidying up any spillage that might occur during the inspection. If you’re planning to flush the braking system, a turkey baster or fluid pump can facilitate the process of extracting old brake fluid efficiently. Ensure your vehicle is parked on a level surface, as this ensures a precise reading of the fluid level and easy access to the reservoir.
Refer to your vehicle’s manual for specific recommendations regarding brake fluid type and maintenance schedules. Most manufacturers, including Honda and Ford, advocate for changing brake fluid every 2 years or 24,000 miles (approximately 38,624 kilometers), depending on which comes first, to safeguard brake performance.
How to Locate the Brake Fluid Reservoir in Your Vehicle
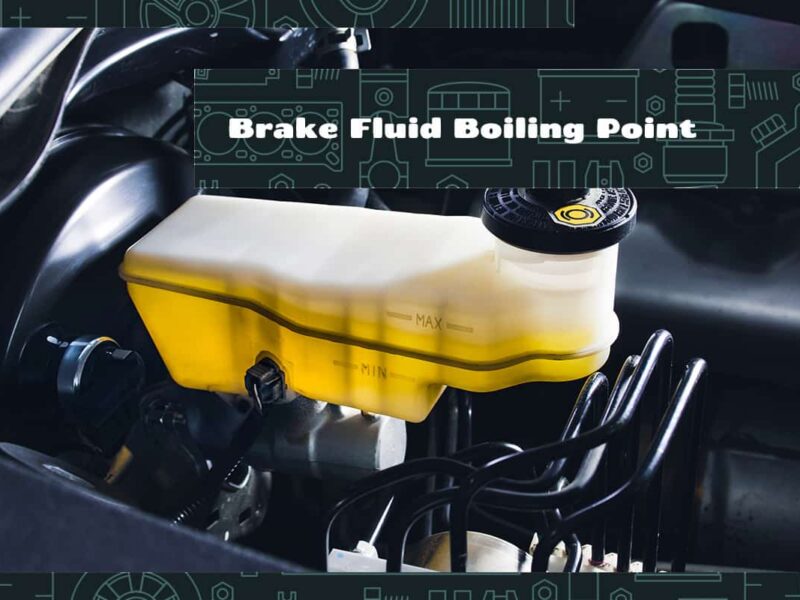
The brake fluid reservoir is typically positioned near the back of the engine bay, on the driver’s side. Most vehicles have a small, translucent plastic container labeled with either the words “brake fluid” or a brake symbol. Proper identification of this reservoir is critical, as its placement varies among different vehicle models, like the Toyota Camry or the Chevrolet Silverado.
Upon locating the reservoir, examine the exterior markings. These markings usually indicate the ‘MIN’ and ‘MAX’ levels, which show the acceptable fluid range. Utilizing a flashlight can assist you in inspecting the fluid level more clearly. The brake fluid should never drop below the ‘MIN’ line; if it does, immediate action is required to remedy the situation either by refilling or diagnosing for potential leaks or wear in the brake system.
What Are the Steps to Accurately Check the Brake Fluid Level?
Having gathered your materials and identified the brake fluid reservoir, let’s delve into the step-by-step process for accurately checking the brake fluid level:
- Open the Hood: Start by engaging the hood release and propping the hood open securely to give you access.
- Inspect the Reservoir: Visually evaluate the fluid level against the ‘MIN’ and ‘MAX’ lines. If the reservoir is lower than the ‘MIN’ line, a refill is necessary.
- Clean the Area: Prior to opening the reservoir cap, ensure the area surrounding it is free of dirt. Contamination can lead to brake system inefficiency and failure.
- Add Brake Fluid: If needed, carefully remove the cap and pour in the recommended type of brake fluid until the level reaches the ‘MAX’ line. Avoid overfilling to ensure brake function remains within optimal standards.
- Check for Leaks: Once the cap is secured, perform a thorough check for signs of leakage around the reservoir and brake lines. Any indication of leakage should prompt immediate investigation.
How Can You Assess the Color and Condition of Brake Fluid?
The assessment of brake fluid color is a crucial indicator of its operational efficacy. Fresh brake fluid appears clear to light amber, signifying it is free from contamination. Conversely, darker shades such as brown or black denote potential issues — specifically, moisture absorption and degradation products that could compromise effective braking.
Maintain awareness that the acceptable moisture threshold for glycol-based brake fluids is approximately 3% or less. Surpassing this threshold can result in substantive corrosion of critical components like the master cylinder and brake calipers. Numerous manufacturers emphasize regular inspection to avoid severe complications from degrading brake fluid.
If dark fluid is identified during your inspection, immediate flushing of the braking system should be undertaken following the manufacturer’s service guidelines. This usually involves utilizing a brake bleeder kit, once old fluid is extracted, it should be replaced with new fluid, effectively restoring optimal performance.
| Brake Fluid Type | Boiling Point (°F/°C) | Moisture Absorption Rate |
|---|---|---|
| DOT 3 | 401/205 | 3% or less |
| DOT 4 | 446/230 | 3% or less |
| DOT 5 | 500/260 | Not applicable (silicone-based) |
FAQs Regarding Brake Fluid Maintenance
How often should I check my brake fluid level?
It’s imperative to check your brake fluid level at least once a month or after every 1,000 miles (approximately 1,609 kilometers), depending on your driving conditions. Additionally, any change in your vehicle’s braking performance warrants an immediate inspection of the brake fluid to prevent exacerbating underlying issues.
Factors such as vehicle usage, frequency of brake application, and driving conditions also play a role in determining how often checks should be performed. For instance, city driving can lead to more rapid fluid depletion as stop-and-go brakes frequently engage.
What should I do if my brake fluid appears dark or contaminated?
When you observe that your brake fluid has darkened, it signals the presence of impurities and elevated moisture levels, seriously affecting its performance. In this situation, a system flush is crucial to prevent corrosion and ensure optimal braking capabilities. Always use fluid that matches your vehicle manufacturer’s specifications when making replacements, as incorrect fluids may further compromise the system.
It’s also beneficial to identify the source of contamination, as persistent dark fluid could indicate underlying issues within the brake system, such as damaged seals or moisture ingress. Regular checks and proactive maintenance can effectively mitigate such concerns.
Can I mix different types of brake fluid?
Mixing various types of brake fluid, such as DOT 3 with DOT 4 or DOT 5 is highly inadvisable due to the potential for chemical reactions that may diminish brake performance. Each type of brake fluid has specific properties regarding boiling point, viscosity, and water absorption; thus, blending them can lead to performance inconsistencies.
Adhering to the brake fluid type recommended by your vehicle manufacturer is critical to ensuring your braking system operates effectively and maintains safety standards. For reference, most documents from major manufacturers such as Volkswagen and Ford suggest strictly following these guidelines.
Where can I find the brake fluid specifications for my vehicle?
The brake fluid specifications for your vehicle are typically included in the owner’s manual. This document provides comprehensive information about the appropriate type of brake fluid based on the manufacturer’s standards.
If the manual is unavailable or unclear, contacting the manufacturer or visiting their official website often yields accurate, detailed specifications. Local automotive parts stores can also assist in identifying suitable brake fluid types by vehicle make and model.
Conclusion
Regularly checking your brake fluid level and color is a fundamental aspect of vehicle maintenance that should not be overlooked. Establishing this routine practice will not only enhance safety but also prolong the operational lifespan of your braking system. For further insights into maintaining brake fluid health and optimizing vehicle performance, explore our related articles, including How to Change Your Brake Fluid: A Complete DIY Guide and Brake Fluid Color Guide: When Do You Need a Flush?.