Restoring your car’s headlights can be a game changer for both aesthetics and safety. DIY headlight restoration kits effectively rejuvenate headlight clarity by removing surface oxidation, enhancing light output significantly. When equipped with a protective UV coating post-restoration, these improvements can last anywhere from 6 to 24 months. Over time, headlights can cloud or yellow due to oxidation, a result of prolonged exposure to ultraviolet (UV) rays and environmental pollutants.
Why Do Automotive Headlights Degrade, and What is the Role of Polycarbonate?
Modern automotive headlights primarily utilize polycarbonate lenses, favored for their remarkable impact resistance and versatility. Unfortunately, this material is not immune to degradation from UV radiation. Manufacturers initially apply a thin, chemically-bonded UV-resistant coating that blocks about 99% of harmful rays. However, with prolonged exposure to sunlight and environmental contaminants, this protective layer breaks down, leaving the polycarbonate vulnerable.
Once the factory-applied UV coating deteriorates, the unprotected surface begins to undergo photo-oxidation. This process creates microscopic pitting, leading to increased haze and a yellowish, cloudy appearance. The resultant degradation can cut light output by 40% to 80%, making nighttime driving a safety concern.
How Do DIY Headlight Restoration Kits Function to Restore Clarity?
DIY headlight restoration kits typically involve a multi-step method aimed at removing the oxidized layer to restore optical clarity. The process usually consists of sanding with increasingly fine abrasives (ranging from 800 to 3000 grit), polishing with specialized compounds, followed by the application of a UV-resistant sealant. This sanding removes the damaged outer layer of the polycarbonate, taking away the compromised factory UV coating. Polishing refines the surface, while the application of a UV-resistant sealant is vital to prevent rapid re-oxidation and extend the restoration’s lifespan.
For a comprehensive, step-by-step guide to the restoration process, check out our article: DIY Foggy Headlight Restoration: A Step-by-Step Guide to Clearer Vision.
What Specific Performance Metrics Do DIY Kits Offer?
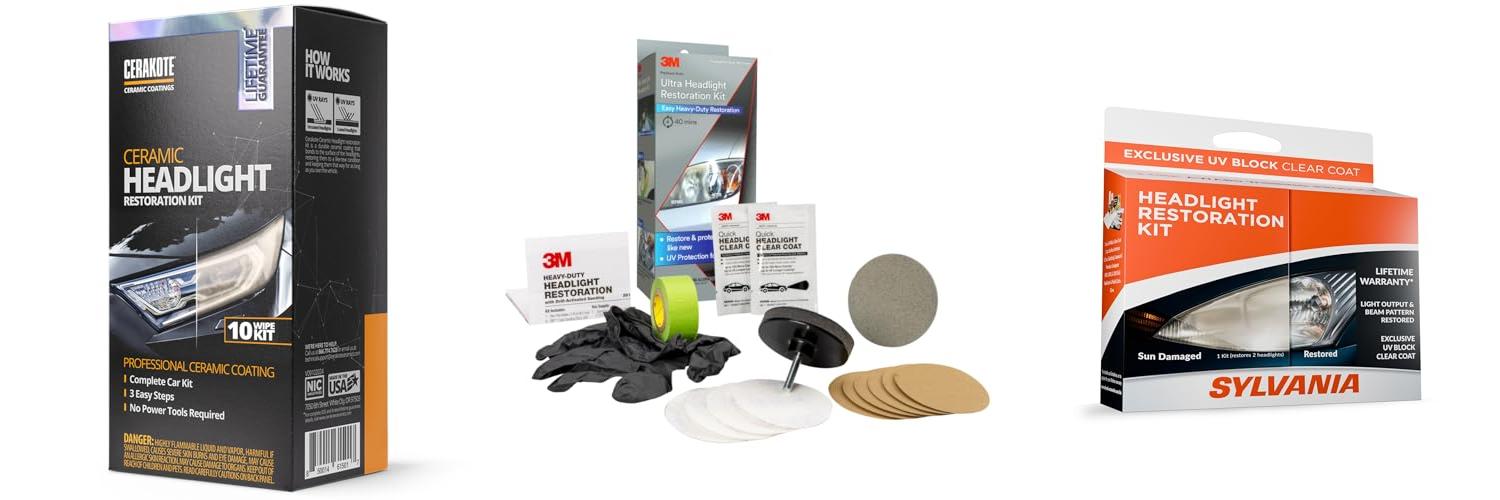
The performance and durability of DIY headlight restoration kits can vary, influenced by the kit’s quality, the degree of degradation, and application technique. Many users report immediate enhancements in clarity and brightness. For example, users of the 3M Headlight Lens Restoration System often describe their headlights looking “brand new” after just 1.5 hours of application, even on heavily oxidized lenses. Meanwhile, the Sylvania Headlight Restoration Kit claims to restore original clarity in under 30 minutes, providing long-lasting protection backed by a lifetime warranty.
However, the longevity of DIY restorations typically ranges from 6 to 12 months without consistent reapplication of a UV protectant. Some advanced kits, such as Meguiar’s Heavy Duty Headlight Restoration Kit, promise protection for over 18 months with their ceramic headlight shield. In contrast, professional restorations can use industry-grade compounds and coatings, allowing for results that last 1 to 3 years or more.
Are There Specific Brands of DIY Headlight Restoration Kits Recommended for Different Degradation Levels?
Numerous reputable brands offer DIY headlight restoration kits tailored to various degradation levels. The Cerakote Ceramic Headlight Restoration Kit is often celebrated as the “Best Overall” option due to its user-friendly approach and high-quality ceramic coating. For heavy oxidation, the 3M Headlight Lens Restoration System is effective, utilizing a drill attachment with a multi-step sanding process. The Mothers NuLens Headlight Renewal Kit is ideal for medium-duty tasks, making use of a PowerBall polishing tool and aggressive sandpaper. For lighter tasks, Meguiar’s Two-Step Headlight Restoration Kit employs scouring pads instead of sandpaper for a gentler touch.
How Do DIY Kits Compare to Professional Headlight Restoration Services?
While DIY kits are budget-friendly (typically ranging from $15-$50) and simple to use, professional services (costing between $75-$200 per vehicle) generally provide more durable and lasting results. Professionals employ advanced equipment, specialized compounds, and robust UV coatings that can maintain clarity for 1 to 3 years or longer with proper care. DIY kits usually offer temporary improvements, lasting between 6 to 12 months. This difference is largely due to the advanced polymer coatings used in professional methods, which create a stronger barrier against environmental damage. Additionally, skilled technicians can deliver a uniform and flawless finish, something that can be challenging to achieve with DIY approaches.
Comparative Analysis of Popular DIY Headlight Restoration Kits
The table below presents a comparative analysis of popular DIY headlight restoration kits, outlining their essential features, application techniques, and reported longevity based on user experiences.
| Kit Name | Key Features | Application Method | Claimed/Reported Longevity (with UV protection) | Approx. Cost Range (USD) |
|---|---|---|---|---|
| 3M Headlight Lens Restoration System | Multi-step sanding (500, 800, 3000 grit) and polishing; drill-powered process. | Drill attachment for sanding and buffing. | Users report significant clarity improvement, with a “like-new” appearance for months to over a year with sealant. | $15 – $25 |
| Meguiar’s Heavy Duty Headlight Restoration Kit (G2980) | Includes sanding discs, PlastX Clear Plastic Cleaner & Polish, Easy-Buff Wool Pad, Ceramic Headlight Shield. | Drill-powered polishing with hand application of ceramic shield. | Offers up to 18+ months of protection and clarity. | $20 – $30 |
| Sylvania Headlight Restoration Kit | 3-step process: Surface Activator, Sand & Polish, UV Block Clear Coat applicator. | Manual sanding and wiping. | Durable, lasting protection with a Lifetime Warranty. | $20 – $35 |
| Cerakote Ceramic Headlight Restoration Kit | Features a ceramic coating for enhanced protection; foam grip for sanding. | Manual wet sanding with a foam applicator for the ceramic coating. | Claims “crystal clear for years” (manufacturer claim). | $18 – $20 |
| Chemical Guys Headlight Lens Restorer and Protectant | Effective compound for minor discoloration; can be used with a drill attachment. | Hand application with a sponge/microfiber or drill-powered buffing. | Effective for minor discoloration; results may last if reapplied regularly. | $15 – $25 |
What are the Risks and Limitations of DIY Headlight Restoration?
While DIY kits offer affordability and convenience, they come with inherent risks. Improper usage of abrasive materials, such as sandpaper, can lead to scratches or uneven surfaces, potentially exacerbating damage to the lens. Many DIY kits do not contain robust, professional-grade UV sealants, which means restored headlights may re-yellow within months if not properly protected. Additionally, for concerns beyond superficial oxidation—such as substantial internal heat damage causing micro-cracking—DIY kits may not suffice, necessitating full lens replacement.
For insights into common headlight issues, consider reading: Troubleshooting Common Car Headlight Problems: Dimness, Flickering, and More.
How Can the Longevity of DIY Headlight Restoration Be Maximized?
To maximize the clarity and effectiveness of DIY headlight restoration, consistent maintenance is crucial. Applying a high-quality, UV-resistant sealant or clear coat every 6 to 12 months is necessary to combat degradation. It’s best to park in shaded areas or use a car cover to reduce direct UV exposure, which is the primary cause of headlight deterioration. Regular washing with automotive soap and microfiber cloths also helps eliminate contaminants without damaging the protective layers. For added protection, consider installing a paint protection film (PPF) specifically designed for headlights, which provides robust resistance against scratches, debris, and UV light. Explore cleaning methods in our article: Sparkle and Shine: The Best Methods for Cleaning Your Car’s Headlight Exterior.
FAQs on DIY Headlight Restoration Kits
- Do DIY headlight restoration kits provide a permanent solution?
- No, DIY kits offer temporary restoration, typically lasting between 6-24 months. The factory UV coating, once stripped away during the process, cannot be fully replicated, resulting in eventual re-yellowing.
- Can a DIY kit fully restore severely oxidized headlights?
- While DIY kits can significantly enhance severely oxidized headlights, achieving a “like-new” clarity may not always be possible for extreme cases that require professional intervention or complete headlight replacement.
- Is a drill attachment necessary for all DIY headlight restoration kits?
- Not all kits require a drill. For instance, the Sylvania kit employs manual sanding and wiping, while options like the 3M and Meguiar’s heavy-duty kits incorporate drill attachments for more effective material removal.
- What is the primary cause of headlight degradation after restoration?
- The main cause of re-degradation post-restoration is continued exposure to UV radiation, which deteriorates both the polycarbonate and any aftermarket UV protective coatings over time.
- How often should I reapply a UV sealant after DIY headlight restoration?
- To ensure maximum longevity and clarity, a UV-resistant sealant should be reapplied every 6 to 12 months.