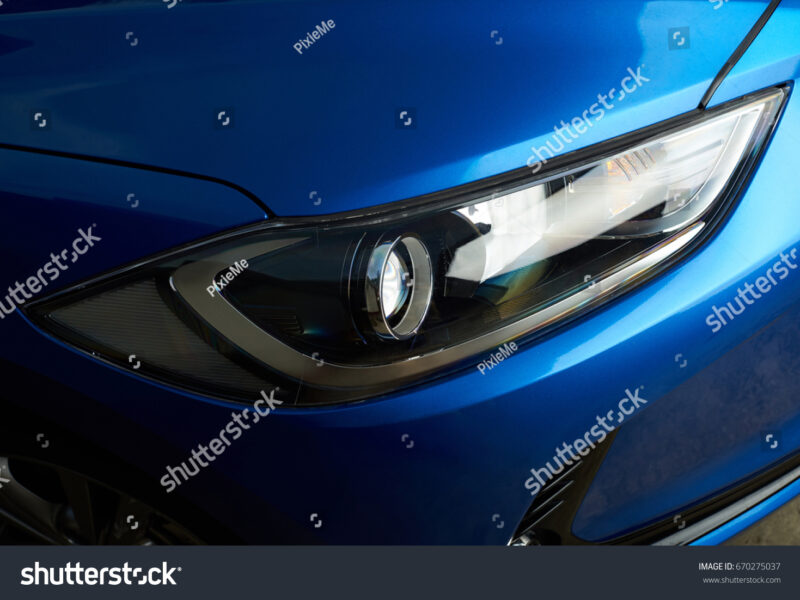
Replacing your car headlights is a comprehensive DIY task that directly restores optimal visibility and enhances driving safety, particularly during nighttime or adverse weather conditions. This guide will provide detailed, actionable steps to empower vehicle owners to undertake this essential maintenance, ensuring their car meets stringent safety and performance standards.
When Is Headlight Replacement Necessary, and Why Is It Critical for Driving Safety?
Headlight replacement becomes essential when the existing units no longer provide adequate illumination, are experiencing functional failures, or have suffered irreparable structural damage. A primary indicator is when headlight lenses become opaque, severely yellowed, or deeply cloudy, directly reducing their light output by as much as 70% and significantly compromising the illumination range. This degradation often stems from prolonged exposure to intense ultraviolet (UV) radiation from the sun, which chemically degrades the advanced polycarbonate plastic lens material, leading to irreversible oxidation and micro-fissures that cause haziness and diminished light projection.
Beyond cosmetic issues, critical functional failures such as persistent dimming, intermittent flickering, or a complete outage of the headlight assemblies significantly compromise driving safety, especially at speeds exceeding 40 mph where reaction time is crucial. These issues can arise from internal damage to complex headlight assembly components, critical seal failures allowing moisture ingress that affects electrical circuits, or physical impacts that crack the lens or housing. While minor haziness can sometimes be addressed through meticulous restoration techniques detailed in Restore Your Car Headlights: A Comprehensive DIY Guide for Clarity and Safety, severe and irreversible degradation necessitates a full replacement for guaranteed reliable performance and adherence to Department of Transportation (DOT) standards.
Unlike simple bulb replacements or minor electrical system fixes, a full headlight assembly swap addresses structural integrity, optical clarity, and electrical reliability simultaneously. Modern headlight assemblies are complex units, incorporating advanced optics and precise mounting points. Once the lens’s protective layers are compromised beyond the scope of superficial cleaning methods, like those discussed in Sparkle and Shine: The Best Methods for Cleaning Your Car’s Headlight Exterior, a new unit guarantees the light beam pattern and intensity are restored to precise factory specifications, which is absolutely crucial for safe driving and passing annual vehicle inspections.
What Specific Tools and Materials Are Essential for a Successful DIY Headlight Replacement?
Executing a car headlight replacement successfully and efficiently requires a specific set of professional-grade tools and materials to ensure precision and prevent incidental damage to surrounding vehicle components. Key hand tools include a comprehensive metric socket set, typically ranging from 8mm to 15mm for most automotive fasteners, along with a selection of Phillips and flathead screwdrivers. A specialized plastic trim removal tool set is particularly important for safely prying off delicate bumper covers, grille pieces, and fender liners without scratching paint or breaking fragile plastic clips that often secure these panels.
Beyond basic hand tools, acquiring a new pair of headlight assemblies specifically designed for your vehicle’s exact make, model, and year (e.g., a 2018 Honda Civic sedan) is paramount. It is highly recommended to replace both headlight units simultaneously to ensure uniform light output, identical beam patterns, and aesthetic balance, as one aged headlight will typically fail or degrade soon after the other. Always meticulously verify the manufacturer’s part number against your vehicle’s specifications, often found in the owner’s manual or on the existing part, to ensure perfect fitment and seamless compatibility with existing wiring harnesses and electrical systems.
Additional indispensable materials include high-quality painter’s tape (e.g., 3M Blue Painter’s Tape) to protect adjacent painted body panels during the removal and installation phases, a lint-free microfiber cloth for cleaning new lens surfaces, and dielectric grease (e.g., Permatex 22058) for application on electrical connections to prevent future corrosion and ensure optimal conductivity. A clear, well-lit workspace and the potential use of a robust floor jack with safety jack stands (if wheel well or undercarriage access is mandated for bumper removal) will further facilitate the process, significantly enhancing both safety and precision during this critical DIY repair.
How Do I Choose the Right Replacement Headlight Unit for My Vehicle?
Choosing the correct replacement headlight unit is critical for achieving optimal performance, longevity, and adherence to safety regulations. You typically have two primary options: Original Equipment Manufacturer (OEM) parts or reputable aftermarket alternatives. OEM headlights are identical to the units originally installed on your vehicle from the factory, guaranteeing a perfect fit, consistent quality, and validated performance. They are often constructed from high-grade polycarbonate plastic, featuring multi-layer, robust UV protection coatings engineered to resist future yellowing and haziness caused by prolonged exposure to UV radiation and aggressive road chemicals for a service life typically exceeding 5-7 years.
Understanding Different Headlight Technologies: Halogen, LED, and Xenon (HID)
The type of headlight technology installed in your vehicle significantly impacts replacement procedures and unit selection.
- Halogen Headlights: These are the most common and cost-effective, using a tungsten filament bulb filled with halogen gas. Replacement often involves simply swapping the bulb, but if the assembly is degraded, a full halogen-specific unit is needed.
- LED Headlights: Light Emitting Diode (LED) systems offer superior energy efficiency, longer lifespan (often exceeding 10,000 hours), and brighter, whiter light. Replacement units must be specifically designed for LED systems, and often the entire assembly is replaced, as individual LED components are integrated. These require careful handling of complex wiring and sometimes specific control modules.
- Xenon (HID) Headlights: High-Intensity Discharge (HID) lights produce a very bright, bluish-white light using a capsule of xenon gas. They require a ballast (igniter) and can be more complex to replace. Ensure any replacement unit includes or is compatible with the necessary ballast and wiring, as incorrect installation can lead to electrical issues or failure to ignite.
Aftermarket headlights, while often more budget-friendly with price points typically 20-50% lower than OEM units, can vary significantly in their material quality and performance metrics. When considering aftermarket options, it is imperative to prioritize reputable brands that explicitly specify adherence to rigorous industry standards such as DOT (Department of Transportation) or SAE (Society of Automotive Engineers) certifications. These certifications are crucial as they ensure the headlights meet minimum federal safety and performance criteria, including proper light output, precise beam patterns (e.g., a crisp cut-off for low beams), and acceptable glare levels for oncoming traffic.
Always meticulously inspect the lens material and any visible protective coatings on aftermarket units; a high-quality aftermarket assembly should also feature a durable polycarbonate plastic lens with an effective UV-resistant clear coat, similar to OEM specifications. This critical protective layer is absolutely essential to prevent premature degradation from environmental factors such as abrasive road debris and continuous sun exposure, ensuring your investment maintains optimal clarity and functionality over an extended period, typically at least 3-5 years for a good quality unit.
Step-by-Step Guide: How to Safely Remove Your Existing Car Headlight Units?
Removing the existing headlight units often requires careful and systematic disassembly of adjacent body panels, most frequently the front bumper cover, to gain unobstructed access to the headlight assembly’s mounting bolts. Begin by locating and meticulously removing all visible fasteners securing the bumper cover to the vehicle’s fender, grille, and undercarriage. These fasteners typically include various plastic push-pins (e.g., 8mm or 10mm diameter), Phillips head screws, and sometimes specific metric bolts (e.g., 10mm or 12mm) located in wheel wells or along the top edge. Utilize a specialized plastic trim removal tool to gently pry out plastic clips, minimizing the risk of scratching painted surfaces or breaking fragile tabs.
Once the bumper cover is sufficiently loosened or partially removed – in many cases, it might not need to be fully detached, only pulled away enough to clear the headlight — you will gain direct access to the headlight assembly’s critical mounting bolts. Most vehicle manufacturers secure each headlight unit with three to four bolts, commonly 10mm or 12mm in size, which firmly attach it to the vehicle’s structural frame. Carefully remove these bolts, placing them in an organized manner (e.g., labeled containers) to simplify the reinstallation process and prevent loss of essential hardware.
With all mounting bolts extracted, gently pull the entire headlight assembly forward from its cavity within the vehicle’s body, exercising extreme caution to avoid scratching surrounding paintwork or damaging adjacent trim pieces. Before completely detaching the unit, it is imperative to disconnect all electrical wiring harnesses. There are typically one to three distinct connectors for the main headlight (low/high beam), turn signal, and often a dedicated daytime running light (DRL) or fog light circuit. Depress the specific release tab on each connector firmly and pull to disconnect; some older or premium models may also feature a vacuum line for automatic headlight leveling systems that will need to be carefully detached.
How Do I Precisely Install My New Car Headlight Units for Optimal Performance?
Installing your new car headlight units is largely the reverse of the removal process, but it demands even more critical attention to detail to ensure proper function, alignment, and aesthetic integration. Begin by meticulously positioning the new headlight assembly into the vehicle’s designated headlight cavity, ensuring all manufacturer-specific alignment tabs and locating pins (if present) line up perfectly with their corresponding slots in the vehicle frame. Gently push the unit until it sits perfectly flush against the vehicle’s body and structural mounting points, without applying excessive force that could damage the housing.
Proceed to reconnect all electrical wiring harnesses to the new headlight unit. It is crucial to ensure that each connector audibly “clicks” securely into place, verifying a tight and reliable connection to prevent future electrical issues such as intermittent flickering, complete outage, or diagnostic trouble codes. As a preventative measure, it is highly advisable to apply a small amount of dielectric grease (e.g., a pea-sized amount per pin) to the electrical contacts before reconnecting to prevent long-term corrosion, enhance conductivity, and protect against moisture ingress, especially in environments exposed to road salt or harsh chemicals.
Once all wiring is securely connected, reinsert and carefully tighten all mounting bolts (typically 10mm or 12mm) that hold the headlight assembly to the vehicle frame, adhering to the manufacturer’s recommended torque specifications if available (often between 7-10 ft-lbs). Do not overtighten, as this can easily crack the durable polycarbonate plastic housing or strip the threads. After the headlight units are firmly secured, meticulously reposition and reattach the front bumper cover and any other removed trim pieces, ensuring all plastic clips and fasteners are reinstalled correctly for a precise, factory-like fit and finish, eliminating unsightly gaps. Finally, before driving, perform an initial functional test of all lighting components (low beams, high beams, turn signals) and then proceed to a comprehensive headlight alignment.
What Post-Installation Checks and Headlight Alignment Procedures Are Necessary?
After successfully installing your new headlight units, two crucial steps remain to ensure both your safety and the safety of other road users: a thorough functional check of all lighting elements and precise headlight alignment. Start by sitting in the driver’s seat and systematically activating your vehicle’s lighting systems. Verify that the low beams, high beams, turn signals (front and rear), parking lights, and any daytime running lights (DRLs) are all operating correctly and consistently on both new assemblies. Additionally, carefully check your dashboard for any new warning lights or messages that might indicate an electrical fault or an improperly connected headlight unit, such as a “check headlight” or “bulb out” indicator.
Headlight alignment is absolutely paramount for safe nighttime driving and to comply with local traffic regulations. Improperly aimed headlights can severely compromise your ability to see the road clearly, potentially illuminating only 50-70% of the required distance ahead, or, worse, blinding oncoming traffic, which significantly increases accident risk. While professional alignment using specialized equipment is highly recommended for ultimate precision, you can perform a basic DIY alignment to get the headlights into a safe range. Park your vehicle on a perfectly level surface approximately 25 feet (7.62 meters) from a flat, dark wall. Measure the exact height of your headlight’s center from the ground to the center of the lens and mark this precise height on the wall with painter’s tape. The top of the low beam cut-off should typically be at or slightly below this marked line, generally within 2-4 inches below the center height for most vehicles.
Most modern headlight assemblies feature accessible adjustment screws (often requiring a Phillips screwdriver, an 8mm or 10mm socket, or a Torx bit) for both vertical and horizontal aiming. Consult your specific vehicle’s owner’s manual for detailed adjustment procedures and the exact acceptable beam patterns, as these can vary significantly between manufacturers and models. Make small, precise, quarter-turn adjustments to the screws, rechecking the beam pattern on the wall after each adjustment. The goal is to ensure your new headlights provide optimal road illumination with a clear, defined cut-off line, directing light where it’s needed without causing excessive glare for other drivers, thereby maximizing the safety benefits and operational efficiency of your DIY replacement.
| Feature | OEM Headlight Assembly | Aftermarket Headlight Assembly |
|---|---|---|
| Fit and Finish | Guaranteed exact fit and seamless integration, matching factory specifications within ±0.5mm tolerances. | May vary significantly; fitment can be slightly off (e.g., ±2-3mm gaps), potentially requiring minor adjustments during installation. |
| Material Quality | High-grade polycarbonate plastic with durable multi-layer UV coatings, engineered for 5-7 years minimum resistance to degradation. | Varies widely; can be good quality with basic UV protection or cheaper plastic prone to yellowing and haziness within 1-2 years. |
| Durability/Longevity | Designed for long-term resistance to UV radiation, abrasive road debris, and harsh chemical exposures, typically 7-10 years lifespan. | Depends entirely on brand reputation; some offer comparable durability, others degrade faster due to inferior coatings or materials, lasting 2-5 years. |
| Performance (Light Output/Beam Pattern) | Meets or exceeds factory specifications for light output (e.g., 900-1200 lumens per bulb) and precise beam pattern, ensuring optimal road illumination and minimal glare. | Varies; reputable brands (e.g., Depo, TYC) meet DOT/SAE standards, while lesser brands may have inconsistent light output, poor beam patterns, or excessive glare, impacting safety. |
| Price Range (per unit) | Higher, typically ranging from $200 – $800+ for common vehicles, and potentially exceeding $1000 for luxury or performance models (e.g., a Mercedes-Benz C-Class headlight). | Lower, generally ranging from $70 – $400 per unit, depending on the brand, vehicle complexity, and specific lighting technology (e.g., halogen vs. LED). |
| Warranty | Typically 1-3 years, often backed by the vehicle manufacturer and sometimes tied to the vehicle’s original warranty period (e.g., 3-year/36,000-mile). | Varies significantly by aftermarket manufacturer; common warranties range from 90 days to 1 year, with some premium brands offering 2 years. |
How long does it typically take to replace car headlights DIY?
The total time required to replace car headlights through a DIY approach varies significantly depending on the vehicle’s specific make and model, as well as the DIYer’s mechanical experience level. For vehicles where the headlight assembly is easily accessible, often secured by only a few visible bolts and no bumper removal, the process can be completed in as little as 30 minutes to 1 hour per side, totaling 1 to 2 hours for both. However, for many modern vehicles, the front bumper cover must be partially or fully removed to gain access to the headlight mounting bolts and wiring harnesses. In such cases, the comprehensive replacement of both headlight units can extend to 2 to 4 hours, accounting for meticulous disassembly, careful installation, and precise reassembly of body panels, followed by initial testing and basic alignment.
Do I need special tools to replace car headlights effectively?
While a fundamental set of basic hand tools is sufficient for many straightforward headlight replacement tasks, some specific tools are highly recommended for optimal efficiency and to prevent inadvertent damage to sensitive vehicle components. Essential tools unequivocally include a metric socket set (typically covering sizes from 8mm to 15mm), various Phillips and flathead screwdrivers, and, crucially, a professional plastic trim removal tool set. These specialized trim removal tools are indispensable for safely disengaging delicate plastic clips and fasteners commonly found on bumper covers, grilles, and fender liners without scratching painted surfaces or breaking fragile plastic components. For certain vehicles with unique fasteners, specialized Torx bits (e.g., T25, T30) or even a cordless impact driver with appropriate torque settings might prove beneficial, though they are not strictly mandatory for every single replacement scenario.
Is it better to replace both car headlights at once for optimal performance?
Yes, it is generally highly recommended to replace both headlight assemblies simultaneously, even if only one unit has visibly failed or degraded. Headlights are subjected to nearly identical environmental stressors, including continuous UV radiation exposure from the sun, abrasive road debris impact, and corrosive harsh chemicals (like road salt), meaning if one unit has reached its end-of-life or experienced significant degradation, the other is very likely not far behind in its deterioration cycle. Replacing both ensures uniform light output (e.g., consistent lumen intensity), identical beam patterns (critical for proper road illumination), and consistent aesthetic appearance, preventing a distracting contrast where one new, bright headlight competes sharply with an older, dimmer, or yellowed one, which can be less effective for overall illumination and potentially a safety hazard. This proactive approach also optimizes time and effort by consolidating the labor-intensive bumper removal (if required) into a single, comprehensive operation, saving future repair time.
Can I replace just the headlight bulb, or do I always need the whole assembly?
Whether you need to replace just the headlight bulb or the entire headlight assembly depends critically on the precise nature of the problem your vehicle is experiencing. If your headlight is exhibiting issues such as dimness, intermittent flickering, or a complete outage, and the outer lens itself is visibly clear, intact, and free from significant yellowing or haziness, then replacing just the bulb (e.g., an H11 halogen bulb, an LED module, or a D1S Xenon bulb) is typically the appropriate and cost-effective solution. Many modern vehicles are designed to allow for convenient bulb replacement without the necessity of removing the entire assembly. However, if the headlight’s outer lens is severely yellowed, deeply hazy, cracked, physically damaged, or has noticeable internal moisture accumulation due to compromised seals, then the entire headlight assembly undeniably needs replacement. This comprehensive approach ensures the full restoration of optical clarity, proper light beam projection, and robust protection of internal components from further environmental degradation, thus guaranteeing optimal safety and performance.
How much does it cost to replace car headlights DIY versus professionally?
The cost to replace car headlights varies widely based on several critical factors, including the vehicle’s specific make and model (e.g., a 2015 Toyota Camry versus a 2020 Audi Q5), whether you opt for OEM (Original Equipment Manufacturer) or aftermarket parts, and whether you choose to perform the replacement yourself (DIY) or hire a professional mechanic. OEM headlight assemblies can range from approximately $200 to over $800 per unit for many common vehicles, with luxury or high-performance cars potentially exceeding $1000 per unit due to integrated complex electronics and adaptive lighting features. Aftermarket units, while generally more affordable, typically cost between $70 and $400 per unit, depending on the brand’s quality and specific lighting technology (e.g., basic halogen vs. advanced LED). If you choose professional installation, labor costs can add an additional $100 to $300 per side, depending on the job’s complexity (e.g., extensive bumper removal requirements) and the shop’s hourly rates (which can range from $80 to $150 per hour). Performing the DIY replacement can significantly reduce the overall expense, limiting costs primarily to the purchase of the new headlight assemblies and any necessary specialized tools.