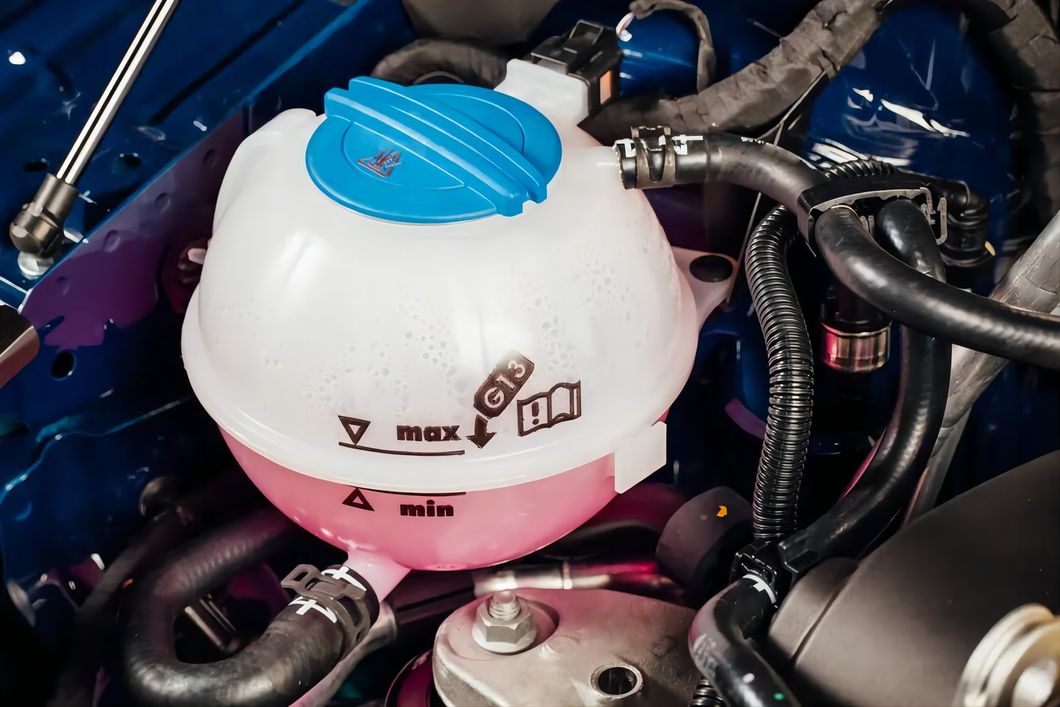
Addressing a car radiator leak promptly is crucial to prevent engine overheating and costly damage to your vehicle’s cooling system. The average cost to fix a radiator leak ranges significantly, from $150 to over $1,000, depending on various factors, including vehicle make and model, the extent of the leak, and whether the repair is performed professionally or as a DIY project. This comprehensive guide will walk you through identifying, locating, and effectively repairing a radiator leak, while also providing insights into associated costs, ensuring your engine maintains optimal operating temperatures.
A failing radiator can quickly lead to your engine’s temperature gauge climbing into the red zone, indicating a critical overheating risk. Understanding the common causes of leaks, such as corrosion, and having the right tools and materials on hand, can enable you to tackle many radiator repairs yourself, safeguarding your vehicle’s performance and longevity. Ignoring even a minor leak can escalate into significant engine problems which can cost upwards of $2,000 to rectify, making timely intervention key.
What Are the Main Causes of Car Radiator Leaks, and What are the Risks?
Car radiator leaks typically stem from wear and tear, corrosion, or physical damage, all of which compromise the integrity of the cooling system. Radiators, often constructed with aluminum cores and plastic side tanks in modern vehicles, are designed to last up to 150,000 miles with proper preventive maintenance. However, repeated heat cycles cause the plastic components to expand and contract, leading to material fatigue and eventual cracks, particularly in the end tanks, hose outlets, or seams.
The primary risk of a leaking radiator is severe engine overheating. When coolant escapes, the engine’s ability to dissipate heat decreases drastically. If the temperature gauge consistently reads in the red zone, it’s a clear indication of potential radiator dysfunction, which can quickly lead to critical engine damage, including warped cylinder heads, blown head gaskets, or even complete engine failure—which might require complete engine replacement costing between $3,500 and $7,500 depending on the vehicle.
Moreover, other common culprits include deteriorated radiator hoses, loose hose clamps, or a malfunctioning water pump. Coolant leaks are often visible as green or orange puddles beneath your vehicle, providing a direct symptom of the problem. Early detection and repair are vital to avoid these severe consequences which can significantly inflate repair costs.
What Tools and Materials are Essential for Radiator Leak Repair?
Before embarking on any radiator repair, gather the necessary tools and materials to ensure a smooth and efficient process. Having everything readily available will allow you to address the issue systematically and safely. Always ensure the engine is completely cool before attempting any work on the cooling system to prevent burns from hot coolant or steam.
For most DIY radiator leak repairs, you will need a selection of basic hand tools and specialized automotive supplies. Essential tools include screwdrivers (flathead and Phillips), socket wrenches, pliers (especially for hose clamps), and a drain pan to collect old coolant. Safety gear, such as protective gloves and safety glasses, is also highly recommended to prevent personal injury while working on the vehicle.
Depending on the nature of the leak, you might also require specific repair materials. For small cracks or pinholes, a two-part epoxy or a fiberglass repair kit can be effective. For hose repairs, new radiator hoses, hose clamps, and a utility knife may be necessary. Additionally, a cooling system pressure tester can help locate elusive leaks, and of course, fresh engine coolant suitable for your vehicle is essential for refilling the system after the repair. The average price for a cooling system pressure tester ranges from $20 to $100, depending on the brand and features.
How Can You Locate and Repair a Radiator Leak?
Fixing a radiator leak effectively begins with accurately pinpointing its source. Leaks can originate from various points within the cooling system, including the radiator core, plastic end tanks, hoses, or connections. A thorough inspection is crucial before proceeding with any repair. Always ensure the engine is off and completely cool to avoid injury.
Step 1: Locate the Leak
Begin by visually inspecting the radiator, hoses, and surrounding components for any signs of coolant leakage, such as puddles, stains, or residue. Green or orange fluid is usually a telltale sign of coolant. Pay close attention to the upper and lower radiator hoses, their connection points, and the radiator’s seams and fins. You may need to clean the radiator surface with a hose to remove dirt and grime, being careful not to damage the delicate cooling fins.
If the leak isn’t immediately visible, a cooling system pressure tester is an indispensable tool. This device attaches to the radiator or coolant reservoir and pressurizes the system, making small leaks more apparent. Pump the system to about 10-15 PSI (pounds per square inch). However, never exceed 15 PSI to avoid damaging the system. A UV dye kit, which adds fluorescent dye to the coolant, can also help locate leaks when viewed with a UV light.
Step 2: Prepare the Area for Repair
Once the leak is located, you must prepare the affected area. If the leak is in a hose, first drain the coolant into a clean drain pan. Never drain coolant onto the ground due to environmental hazards. Then, remove the old hose by loosening the hose clamps with a screwdriver or pliers. If the hose is stuck, carefully cut it to avoid damaging the radiator fitting. For leaks on the radiator surface, thoroughly clean and dry the area. Use fine-grit sandpaper (around 80-grit) to lightly scuff the surface around the crack or pinhole, promoting better adhesion for repair materials.
Step 3: Apply the Repair Solution
The repair method depends on the leak’s nature. For small cracks or pinholes in plastic or metal radiator tanks, a two-part epoxy or a fiberglass repair kit is an effective DIY solution. Mix the epoxy according to the manufacturer’s instructions and apply it generously to the cleaned, sanded area. For a fiberglass kit, cut a piece of fiberglass cloth to size, apply a layer of epoxy, lay the cloth over it, and then apply another layer of epoxy, ensuring full saturation. For instance, J-B Weld RadiatorWeld can effectively seal cracks up to 4 inches and holes up to 1/4 inch in diameter.
For damaged radiator hoses, the best long-term solution is complete replacement. Drain the coolant, remove the old hose, clean the hose fittings on both the engine and radiator, and install a new hose with new clamps, tightening them securely. Temporary fixes for hoses include using self-fusing silicone tape or heavy-duty duct tape, but these should only serve to get you to a repair shop.
Step 4: Refill and Test the Cooling System
After the repair material has cured according to the product’s instructions (often several hours or overnight for epoxies), it’s time to refill the cooling system. Close the radiator drain plug and use a funnel to slowly add the appropriate coolant type, as specified in your vehicle’s manual. Ensure the system is full, then start the engine with the radiator cap off to allow any trapped air bubbles to escape. Top off the coolant level as needed, then replace the radiator cap securely. Run the engine until it reaches normal operating temperature, monitoring the temperature gauge closely. A short test drive is recommended, followed by another check for leaks and coolant levels.
When Should You Use Radiator Stop-Leak Products?
Radiator stop-leak products offer a convenient, temporary solution for small leaks, often useful in emergency situations to prevent immediate overheating. These additives are typically poured directly into the cooling system where they circulate with the coolant, designed to find and seal minor pinhole leaks or hairline cracks in the radiator, heater core, or hoses.
While effective for minor issues, it’s crucial to understand their limitations. Stop-leak products are generally not recommended as a permanent fix, especially for larger cracks, severe damage, or leaks in critical areas like head gaskets. Some mechanics express concern that these products, particularly those with fibrous or particulate matter, could potentially clog narrower passages within the cooling system, such as the heater core, leading to future problems.
However, modern stop-leak formulas, like K-Seal, Bar’s Leaks, and BlueDevil, often use advanced compositions (e.g., liquid aluminum, micro copper particles) that are designed to seal leaks without clogging the system. For example, Irontite Products’ All Weather Seal is lauded for its small particle size that works specifically where the leak is identified. While these products can provide a reliable temporary seal, providing time to arrange for a permanent repair or radiator replacement, they should be applied with caution, following manufacturer instructions carefully.
Comparative Overview of Popular Radiator Stop-Leak Products
| Product Name | Primary Technology/Key Feature | Best For |
|---|---|---|
| K-Seal ST5501 Multi-Purpose One Step Coolant Leak Repair | Micro copper particles, ‘Pour & Go’ formula | Small to moderate leaks in radiators, head gaskets, and heater cores |
| Bar’s Leaks 1186 Liquid Aluminum Stop Leak | Liquid aluminum technology | Radiator, freeze plug, and heater core leaks |
| BlueDevil 00205 Radiator & Block Sealer | No solid/fibrous materials, permanent seal claims | Radiator and block leaks |
| Liqui Moly Radiator Stop Leak | German-engineered additive, compact formula | Minor leaks, hairline cracks in plastic tanks, and pinhole leaks |
What Preventive Measures Can You Take to Avoid Future Radiator Leaks and Overheating?
Proactive maintenance of your vehicle’s cooling system is the most effective way to prevent future radiator leaks and engine overheating. Regular inspections and adherence to a maintenance schedule can significantly extend the life of your radiator and associated components. Simple habits can save you from costly repairs down the line.
It is recommended that car owners perform a radiator flush every 30,000 miles, or at least biennially, depending on their specific car model and driving conditions. This maintenance task removes rust, sediment, and other contaminants that can hinder efficiency and cause corrosion, a leading cause of leaks. Checking coolant levels regularly and topping off with the correct type of antifreeze/coolant is also crucial to prevent potential overheating. Ensure the coolant reservoir is filled to the appropriate mark, especially before long trips.
Furthermore, periodically inspect all radiator hoses for signs of wear, such as cracks, bulges, or excessive softness/hardness. Radiator hose replacements are typically recommended every four years or 60,000 miles, or more frequently if your driving conditions involve a lot of stop-and-go traffic. By integrating these preventative measures into your routine maintenance schedule, you can significantly reduce the likelihood of experiencing unexpected radiator leaks and the subsequent risk of engine overheating.
Frequently Asked Questions
How often should I check my radiator for leaks?
You should visually inspect your radiator and cooling system components for leaks at least once a month, or more frequently if you notice any changes in your vehicle’s temperature gauge or find puddles of fluid under your car. A thorough inspection should be part of your routine maintenance, alongside checking other fluid levels. Additionally, it is highly recommended to check for leaks whenever you top off or change your coolant. Early detection of a small leak can prevent it from escalating into a more significant and damaging issue.
Tools like a cooling system pressure tester can provide a more thorough assessment. This pressure test can help identify leaks that may not be immediately visible or detectable. Consider using dye detection kits for a more clinical approach if you’re dealing with persistent overheating issues; these kits can reveal hidden puddles that pose a threat to your engine’s integrity.
Can I drive with a leaking radiator?
Driving with a leaking radiator is highly risky and generally not advised. Even a small leak can rapidly deplete your engine’s coolant, leading to severe engine overheating. If your temperature gauge enters the red zone, you risk irreversible engine damage, including a warped cylinder head or a blown head gasket. In an emergency situation involving a very minor leak, you might be able to add water and slowly drive to the nearest repair shop, but it is critical to continuously monitor the temperature gauge.
For any significant leak, it is far safer to stop driving, allow the engine to cool down, and arrange for towing or on-the-spot temporary repair. Costs associated with towing can range from $75 to $150, but this is a fraction of the expense involved in fixing an overheated engine, which can amount to thousands depending on the damage incurred.
Is it safe to use radiator stop-leak products?
Modern radiator stop-leak products are generally safe for small, minor leaks and can provide an effective temporary or semi-permanent fix. Formulations such as those from K-Seal, Bar’s Leaks, and BlueDevil are designed not to clog the cooling system and are compatible with all types of antifreeze. However, they should not serve as substitutes for mechanical repairs for larger cracks or severe damage. Always follow the manufacturer’s instructions and ensure the engine is cool before application, as misuse can lead to more complications.
While many advanced formulations can offer short-term relief from issues such as leaks, it is important to view them as stopgap measures rather than solutions. A professional assessment and repair for significant leaks remain the most reliable long-term solution; after using a stop-leak product, scheduling a subsequent mechanical inspection is prudent to ensure the underlying problem has not worsened or resulted in additional damage.